 Save
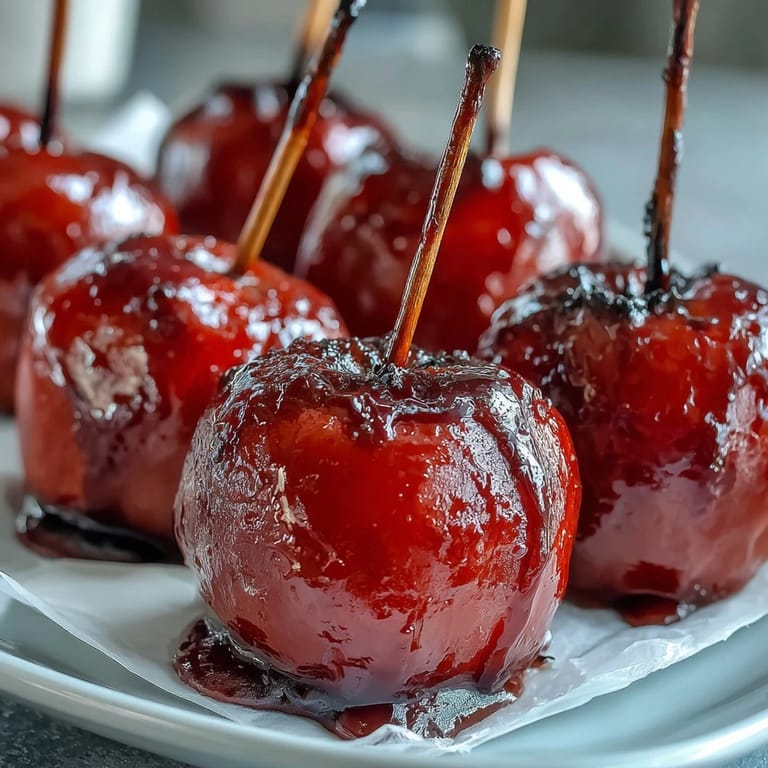
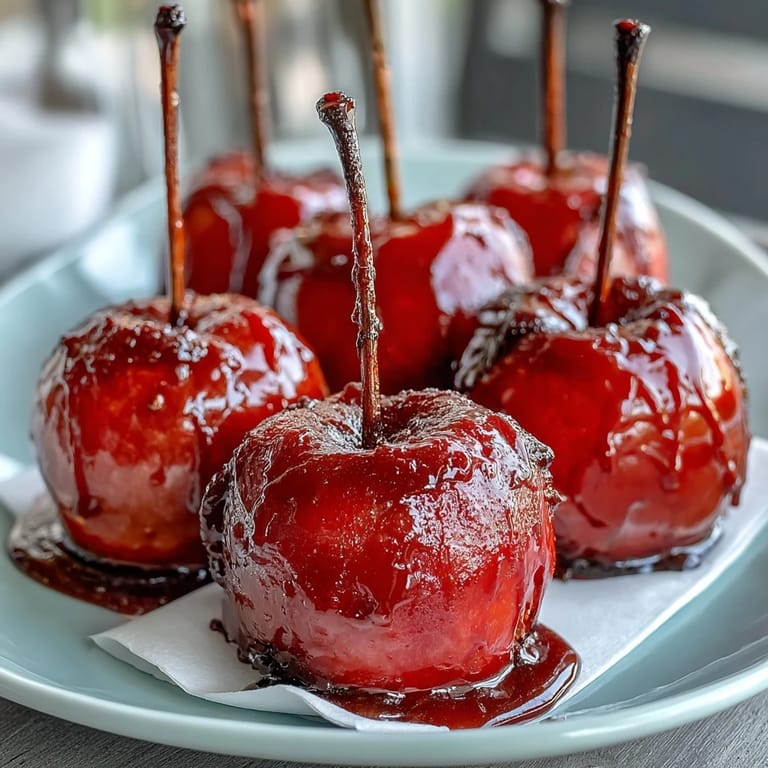
Save My daughter came home from school talking about a classmate's birthday party where everyone got candy apples on sticks, and suddenly our kitchen became ground zero for an obsession. We started small—just wanting to recreate that magic of biting through a crispy, glossy candy shell into tart apple flesh—but what I loved most was watching her eyes light up the first time she dipped one herself. These mini versions became our weekend project, the kind of thing that fills your kitchen with the smell of hot sugar and makes everything feel festive.
What surprised me most was hosting a small gathering where I set out a tray of these, and watching grown adults get just as excited as the children. One friend asked if I'd gone to culinary school—I laughed because this recipe took me less time than baking cookies. That moment made me realize candy apples aren't really about complexity; they're about creating something beautiful and shareable with your hands.
Ingredients
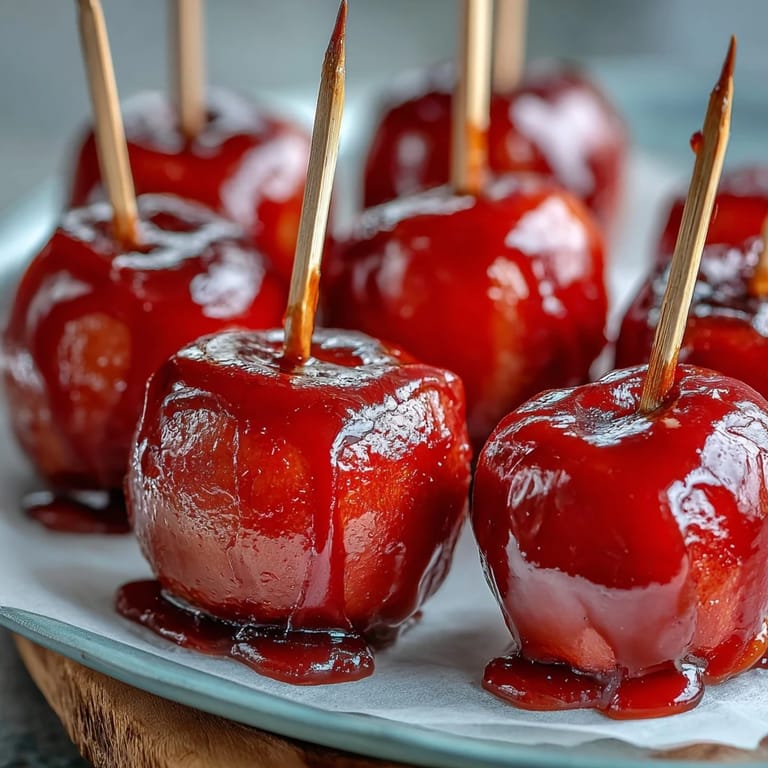
- Small apples like Gala or Fuji (or crabapples): Choose firm ones without soft spots, and the smaller they are, the more manageable they'll be for dipping—I learned this after my first attempt with oversized Honeycrisps that barely fit in my saucepan.
- Granulated sugar: This is your candy foundation, and measuring it precisely makes all the difference between a glossy coat and a grainy mess.
- Light corn syrup: This prevents crystallization and gives you that beautiful, professional-looking shine that makes people think you're some kind of candy wizard.
- Water: Combine with sugar and corn syrup to create the base for your candy mixture.
- Red gel food coloring: Gel colors work better than liquid—they won't thin out your mixture and will give you that vibrant, jewel-like finish.
- Wooden sticks: Make sure they're food-grade and sturdy enough to hold the weight of a dipped apple; cheap sticks can split or crack at the worst moment.
- Nonstick cooking spray or parchment paper: This prevents your cooled apples from sticking and makes cleanup actually bearable.
Tired of Takeout? 🥡
Get 10 meals you can make faster than delivery arrives. Seriously.
One email. No spam. Unsubscribe anytime.
Instructions
- Prepare your apples:
- Wash them thoroughly and dry them completely—any moisture will make the candy coating slip right off. If you're using larger apples, halve them and scoop out seeds with a melon baller, then push a wooden stick firmly into the stem end where it'll hold steady.
- Set up your workspace:
- Line your baking sheet with parchment paper and lightly grease it, or use a silicone mat sprayed with nonstick spray—this is where your candy apples will cool, so you want them to release easily.
- Create your candy mixture:
- Combine sugar, corn syrup, and water in a medium saucepan and stir over medium heat until the sugar dissolves completely. Once dissolved, stop stirring and let the mixture do its thing—stirring after this point causes crystallization.
- Cook to hard crack stage:
- Turn the heat to high and let it boil without stirring until your candy thermometer reads 290°F, which usually takes 8 to 10 minutes. You'll notice the mixture gradually shift from clear to pale amber—that's your signal you're getting close to the perfect temperature.
- Add color and move fast:
- Remove from heat and carefully stir in your gel food coloring until it's evenly distributed, then work quickly because this candy hardens surprisingly fast once you stop heating it. Dip each apple into the hot coating with a gentle swirl to coat all sides, let the excess drip off for a few seconds, then place it on your prepared sheet.
- Let them cool and set:
- Leave them at room temperature for about 10 minutes until the candy hardens completely—this is the hardest part because they look so gorgeous and you'll want to bite into one immediately. Resist the urge and let them cool fully, or you'll burn your mouth on molten sugar.
 Save
Save There was a moment when my daughter brought one to show-and-tell at school, and her teacher mentioned it was the prettiest thing anyone had brought in all week. That simple comment shifted how I see these candy apples—they're not just a snack, they're a little edible art project that takes maybe 30 minutes total.
The Decoration Game
Once you master the basic red coating, the real fun begins—I started experimenting with different colors and realized gel food coloring opens up endless possibilities. My favorite discovery was dipping the freshly coated apples into sprinkles, crushed cookies, or mini chocolate chips while the candy was still slightly tacky, which gives you this textured, jeweled effect that looks restaurant-quality. Just work quickly because once that candy sets, nothing will stick to it, so you've got maybe 30 seconds before you lose your window.
Temperature Matters More Than You Think
I made a batch where I was impatient and removed the mixture at 285°F thinking it would be close enough—it wasn't. The apples came out with a gummy, chewy coating instead of that satisfying crack, and I had to toss them. The hard crack stage at exactly 290°F creates that perfect brittle shell that shatters beautifully when you bite into it, and there's no substituting or approximating this step.
Making It a Moment
These candy apples have become our go-to for small celebrations because they're just formal enough to feel special but casual enough that nobody expects you to have spent hours on them. The best part is how they look on a dessert table or handed out at a party—they catch light, they're colorful, and they immediately make people smile. Here's what I always remember to do:
- Always test your candy thermometer in boiling water first to make sure it's calibrated correctly, saving yourself from batches that don't set properly.
- Keep a small cup of warm water nearby to quickly dip your spoon between apples, which prevents candy buildup and makes dipping cleaner.
- Make these the same day you plan to serve them because they stay perfect at room temperature for hours but lose their crispness the next day.
 Save
Save There's something timeless about handing someone a candy apple on a stick—it's childhood nostalgia wrapped in modern technique, and it proves that the best treats don't require complicated skills, just patience and good ingredients. Make these once and you'll have them in your regular rotation forever.
Recipe FAQs
- → What type of apples work best?
Small apples like Gala, Fuji, or crabapples hold well on sticks and provide the right size for bite-sized treats.
- → How is the candy coating prepared?
The coating is made by boiling sugar, corn syrup, and water to the hard crack temperature, then colored before dipping apples.
- → How can I prevent the candy shell from sticking?
Allow the coated apples to cool and harden at room temperature; avoid refrigeration to keep the shell crisp.
- → Can the candy color be changed?
Yes, substituting the red gel food coloring with other colors like green or blue offers fun variations.
- → Are there any safety tips for handling the coating?
The hot candy syrup reaches high temperatures; adult supervision is recommended during preparation to avoid burns.
- → What tools are needed?
A medium saucepan, candy thermometer, wooden sticks, baking sheet, and parchment paper or silicone mat are essential.