 Save
Save The first time I set a marble slab on my dining table, I felt like I was unveiling something precious. My friend Sarah leaned over and said, "This looks like you broke open a mountain," and I realized that's exactly what I was going for—that raw, unfinished beauty of a quarry frozen mid-discovery. The way those irregular blue and white chunks caught the light made people pause before reaching for anything, which hardly ever happens at a cheese board. I've learned that sometimes the most impressive thing you can do is let good ingredients speak for themselves.
I made this for a dinner party on a rainy November evening when everyone arrived looking tired from their week. Watching faces light up when they saw the marble slab sitting there—still cool to the touch—was like flipping a switch. Someone mentioned it looked like edible geology, and suddenly the whole mood shifted into curiosity and warmth.
Ingredients
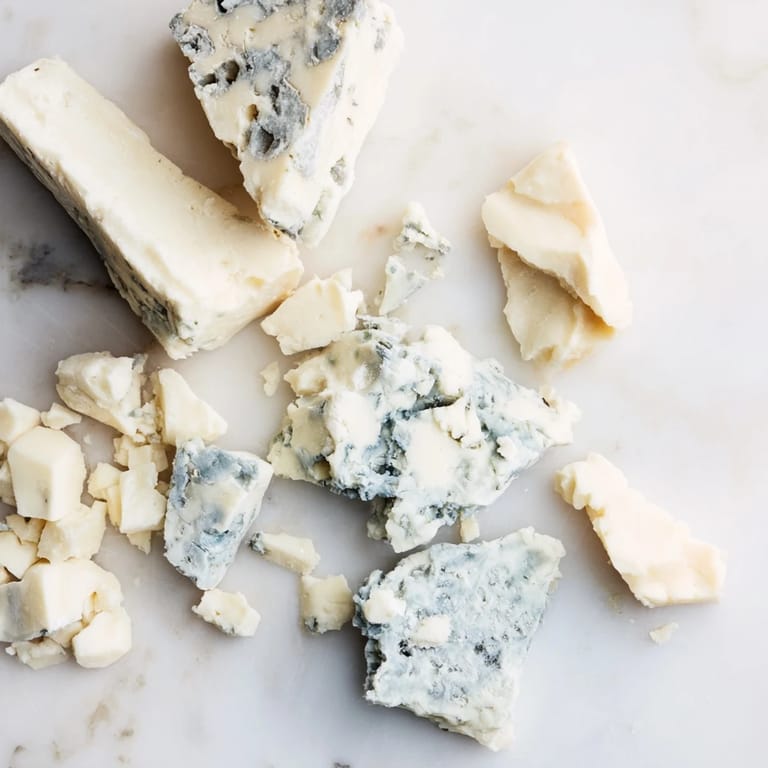
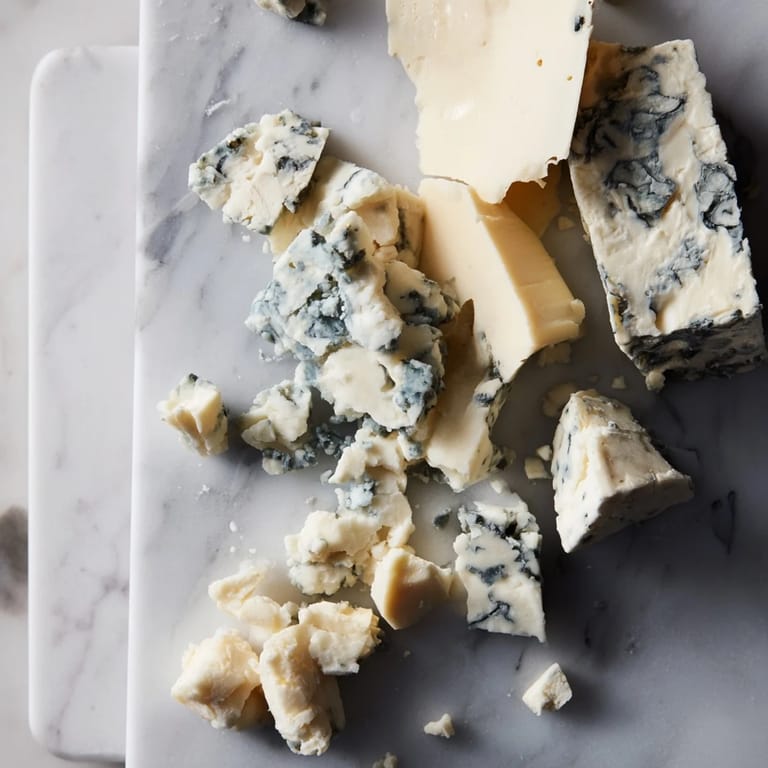
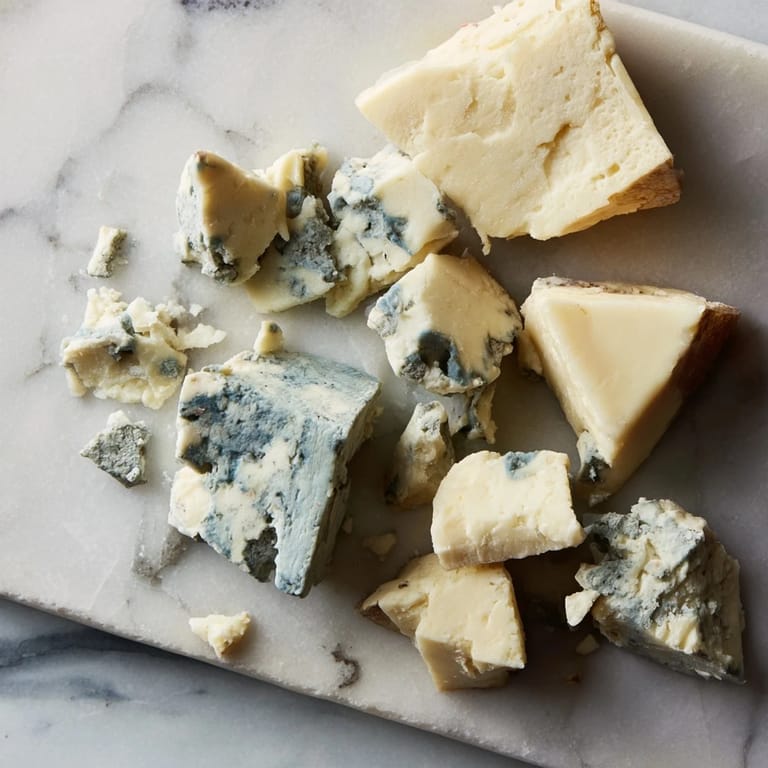
- Blue cheese (Roquefort, Gorgonzola, or Stilton): Cut into large, irregular chunks roughly 1.5 to 2 inches across—the imperfect shapes are what give this board its quarry aesthetic and make each bite unpredictable.
- Aged white cheddar: Cut into similarly large, irregular chunks to mirror the blue cheese and create visual balance through contrast rather than symmetry.
- Fresh grapes or sliced pears: Optional but they provide cooling sweetness that cuts through the intensity of the blue cheese beautifully.
- Assorted crackers or crusty bread: Choose sturdy options that won't crumble under the weight of a generous cheese portion.
- Honey or fig jam: A small drizzle transforms the experience, adding a subtle sweetness that makes the savory cheeses sing.
Tired of Takeout? 🥡
Get 10 meals you can make faster than delivery arrives. Seriously.
One email. No spam. Unsubscribe anytime.
Instructions
- Start with a chilled canvas:
- Place your marble slab in the refrigerator for 20 to 30 minutes before you begin. A cold surface keeps the cheeses firm and looking pristine, and the psychological effect of a cool board somehow makes people eat more slowly and intentionally.
- Scatter with intention:
- Arrange your blue cheese and white cheddar chunks across the slab, leaving deliberate gaps as if you're creating an archaeological dig site. Think of it less like filling space and more like placing monuments—each piece should have room to breathe.
- Layer in sweetness and texture:
- Tuck fresh grapes or pear slices into the negative space, creating little flavor bridges between the cheeses. Position small bowls of honey or jam nearby so people can reach them without needing to ask where things are.
- Serve with confidence:
- Set crackers or bread on a separate board or small plate—this keeps the marble slab as the hero and prevents crumbs from scattering across the display.
 Save
Save There was this quiet moment when everyone had gathered around the board and nobody was talking—they were just tasting, noticing, making tiny discoveries. That's when I knew the simplicity of the presentation had done exactly what I wanted: it made people slow down and actually experience the food instead of just consuming it.
The Art of the Irregular Chunk
Breaking your cheeses into large, uneven pieces is deceptively important. The irregular shapes catch light differently, they give you varied textures to chew through, and they signal to your guests that this is a thoughtful, curated experience rather than something thrown together. I used to cut everything into uniform cubes until someone pointed out that nature doesn't work in grids, so why should your cheese board?
Creating Balance Through Contrast
The beauty of this board lies in letting two completely different cheeses live side by side. Blue cheese is bold, almost aggressive in its flavor—it demands attention. Aged white cheddar is sharp but more predictable, more approachable. Together on marble, they create a conversation: something for the adventurous, something for the cautious, and everything in between. The visual contrast of the blue veining against creamy white also does half the decorative work for you.
Beyond the Basics
Once you've mastered the two-cheese foundation, you'll start seeing endless possibilities. A golden washed-rind cheese adds warmth and earthiness. Creamy goat cheese introduces a completely different texture. Nuts, dried fruit, or even a small pot of quince paste can slot into the gaps without looking crowded. The marble slab becomes your canvas, and the rules are beautifully simple: create pockets of flavor, leave breathing room, and trust your instincts.
- Chill your marble slab beforehand so the cheeses stay cool and firm throughout serving.
- Pair this with a crisp white wine or a light-bodied red that won't overpower the delicate flavors.
- If you don't have a marble slab, any large flat platter works—the quarry effect comes from the arrangement, not the surface.
 Save
Save This cheese board taught me that presentation isn't about perfection—it's about understanding what you're trying to say with your food. Sometimes the most elegant thing is knowing when to stop fussing.
Recipe FAQs
- → What cheeses work best for this marble slab display?
Blue cheeses like Roquefort or Gorgonzola paired with aged white cheddar create a pleasing contrast in color and flavor for this display.
- → How should the cheeses be prepared for serving?
Cut the cheeses into large, irregular chunks to mimic natural quarry shapes and to provide rustic visual appeal.
- → Can accompaniments be added to the marble slab?
Yes, fresh grapes, sliced pears, crackers, and drizzles of honey or fig jam offer complementary flavors and textures alongside the cheeses.
- → Is chilling the marble slab necessary?
Chilling the marble slab before arranging the cheeses helps keep them cool and maintains freshness throughout serving.
- → What tools are recommended for assembling this display?
A marble slab or large platter, a cheese knife, and small bowls for accompaniments simplify assembly and presentation.